Software Engineer, Equity Strategist, Polymath.
Posts tagged database
Searching through all columns in datagridview
016 years
by Ray Tawil
in Visual Basic.Net
Assuming you are searching for the name John, the following procedure will search all existing columns regardless


Dim x As Integer = 0
 While x < DataGridView1.Rows.Count
 Dim y As Integer = 0
 While y < DataGridView1.Rows(x).Cells.Count
 Dim c As DataGridViewCell = DataGridView1.Rows(x).Cells(y)
 If Not c.Value Is DBNull.Value Or Nothing Then
 If CType(c.Value, String) = "John" Then
 MessageBox.Show("Found!")
 End If
 End If
 System.Math.Min(System.Threading.Interlocked.Increment(y), y - 1)
 End While
 System.Math.Min(System.Threading.Interlocked.Increment(x), x - 1)
 End While
 MessageBox.Show("Search complete!")
End SubFiltering a datagridview
016 years
by Ray Tawil
in Visual Basic.Net
assuming you have a datagridview that has data in it.
you want to avoid recalling sql from the database & just want to filter the datagrid.
you can do the following, What you need (1 datagridview (data), 1 button (search), 1 textbox (string to search), 1 variable to precise the criteria your searching for)
Dim findcrit as string
Dim dt As DataTable = Ds_Pos.Employees
 Dim dv As New DataView(dt)

 Dim _RowFilter As String = ""
 Dim _FieldType = dt.Columns(findcrit).DataType.ToString

 Select Case _FieldType
 Case "System.Int32"
 _RowFilter = "convert(" & findcrit & ", 'System.String') like '" & Me.TextBox1.Text & "'"
 Case "System.Int64"
 _RowFilter = "convert(" & findcrit & ", 'System.String') like '" & Me.TextBox1.Text & "'"
 Case "System.Double"
 _RowFilter = "convert(" & findcrit & ", 'System.String') like '" & Me.TextBox1.Text & "'"
 Case "System.String"
 _RowFilter = findcrit & " like '" & TextBox1.Text & "*'"
 End Select
 dv.RowFilter = _RowFilter
 EmployeesDataGridView.DataSource = dv
The cases are to cast the type of variable from any type to string because you can only use the method on string data types.
the idea is to move the content to a data table then filter then return it back to the datatable.
Access Database Connection (OLEDB) – VB NET 2008
016 years
by Ray Tawil
in Visual Basic.Net
Here, I will show you how to make a connection to MS Access 2007 database with VB NET 2008 using wizard. If you’re looking for the sample using code, then this is not what you’re looking for.
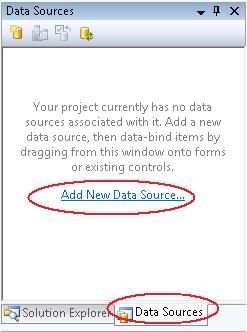
1) Start with NEW windows form projec. When new project has been created, click the “Data Source” tab and choose “Add New Data Source”
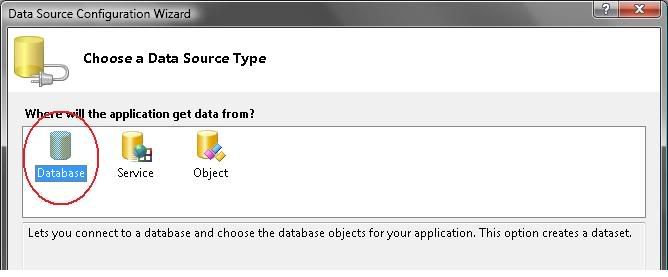
2) Choose “Database” and then click OK
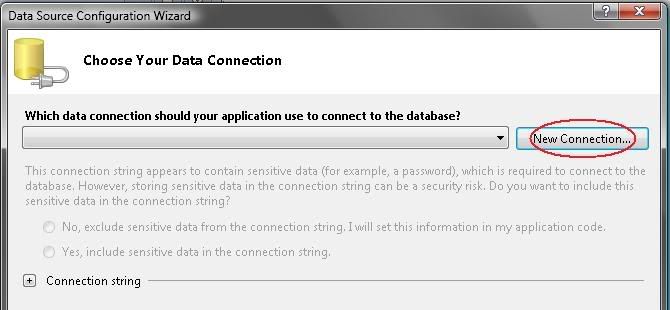
3) Click “New Connection”
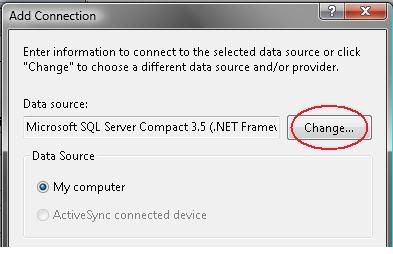
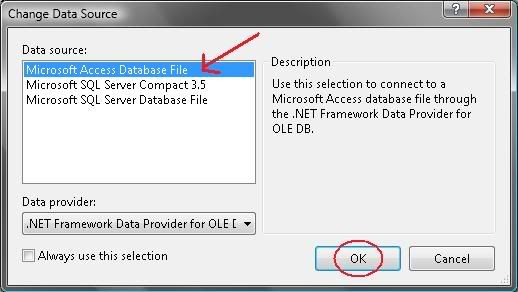
4) on Default, the connection is set to SQL, to make database connection using Access then you need to change it as in the picture below.
5) Select “Microsoft Access Database File” then click OK.
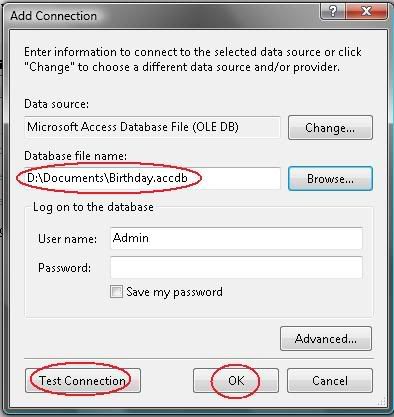
6) The Data Source has been changed to “Microsoft Access Database File (OLEDB)”. Now you need to load your database file to the project. To do this, click “Browse” and point to your database file then click OK to proceed. After all set up, you can click on “Test Connection” to check the connection status. Once you ready, continue to next step by clicking OK button. (see picture below)
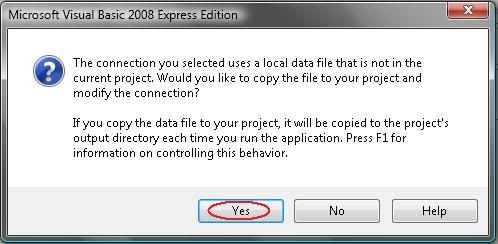
7) You might see this pop up message, just click YES to copy your database file into project folder. From here, just click on “NEXT” button until you reach the part as seen in the picture in STEP 8
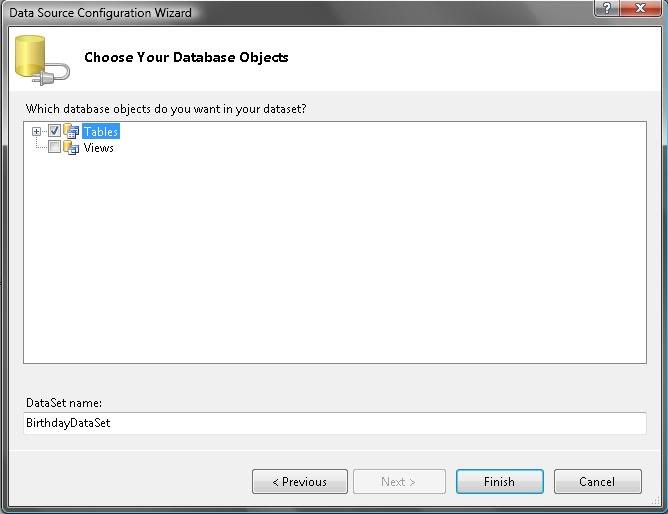
8) Make sure the “Tables” is checked and click “Finish” to proceed to the next step.
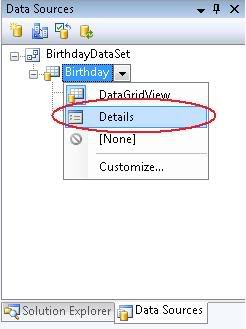
9) Now back to Data Sources window, left click Birthday Table and choose “Details” (see picture below)
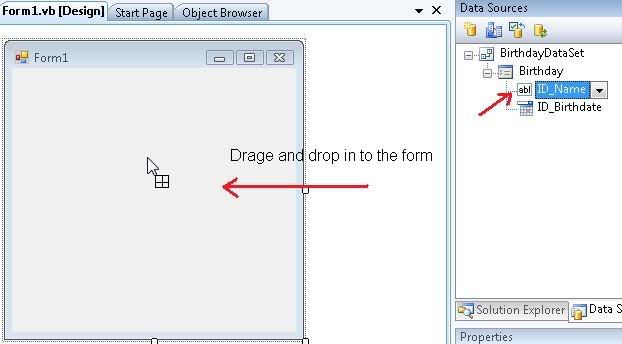
10) Final step in this tutorial. While holding mouse left click on the icon beside “ID_Name”, drag and drop it to the form. Do the same way for “ID_Birthdate”.
Finally, your form might look like this picture below. To navigate through the records in your database, use navigation button on top of the form. You can also execute : Add and Remove command. Press F5 to run the program. (Tips: to see larger picture size, right click on pictures and choose “view image”)
